
First of all, why a drone? If you like photographing waterfalls, you understand the issues, the fact that it is often difficult to impossible to find a good position to shoot the waterfall from. Either there is no land where you really want to be, there are trees or other obstructions limiting your view, and/or there are fences with warnings prohibiting you from entering an area that you might take a good photo from. You can tell the waterfall is beautiful, but can’t get a decent photo of it. A drone does not always enable a good position to shoot from, but it does increase the odds by at least 90% (in my experience).
I am writing this while on a photo expedition in Minnesota, Wisconsin, and Michigan. There are many rivers here in deep, narrow gorges, often with heavy tree cover beside and above. In several locations I had to fly through a small “window” in the trees just to get over the water. Access can be difficult and the flying risky (nobody wants to lose a drone), but the water is wild in the bottom of those gorges, with waterfalls every few yards. But it is not necessary to fly in such extreme conditions to get great photos – there are usually good opportunities at any waterfall you can legally fly at. The photos are often beautiful, and there is a satisfaction in knowing that you have a unique photo, since the shot was not possible by any other means than a drone.
And, even if you can get a good shot from a ground position (and don’t really need a drone), there is nothing quite like a fresh perspective – the view from above.
Allow me to explain the special requirements of waterfall photography. I like a certain amount of motion blur in my waterfall photos:
1/5 second shutter
Without it, the water has a more ragged look:
1/25 second
A longer shutter results in a cotton candy look:
2 second exposure
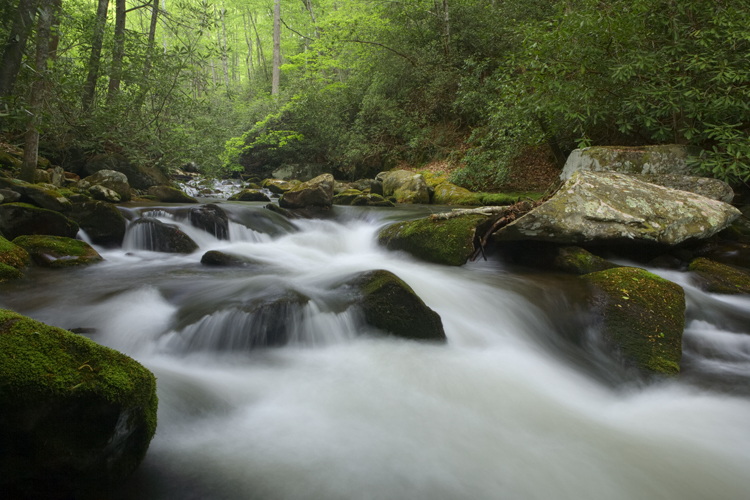
While this look is beautiful in this and some other circumstances, in most cases I prefer some detail and texture in the water:
.6 second exposure
Close-up of the same image to reveal the detail and texture: 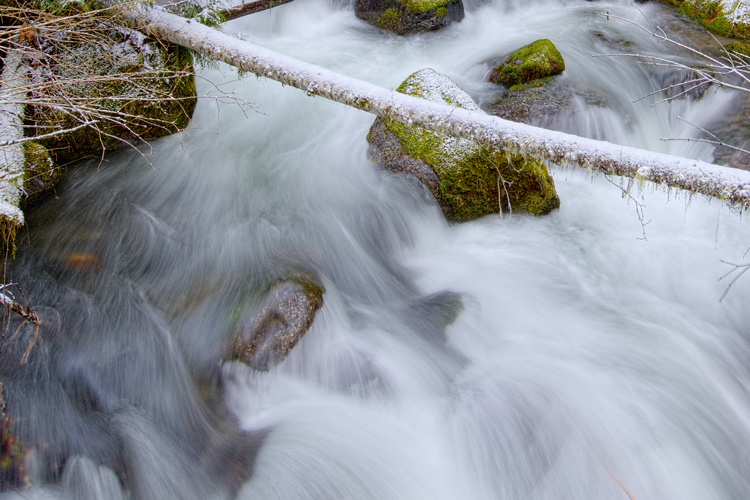
(I used the previous two images from a land-based camera to illustrate my point because I already have photos to work with. All the others were taken with a drone.)
As the photographer, you get to decide what look you prefer and shoot accordingly.
The amount of motion blur that you get is a function of the speed of the water and the shutter speed. When you have a certain look in mind, faster water will require a faster shutter, and slower water a longer exposure. With a land-based camera I always start with a .4 second exposure, then bracket up and down from there, choosing my favorite when editing the batch. It is not possible to get a decent photo while hand-holding a camera with such a slow shutter. Even if the water looks OK (it is supposed to be blurred), the rocks will not – they will be blurred too. At certain shutter speeds (notably around .3 to .5 sec exposure) it is difficult to keep the rocks sharp even while using a tripod; mirror lock-up and delay timing are often required for acceptable results.
With those requirements in mind, I saw no way that a drone could be up to the task. Then I stumbled on Stewart Carroll’s video, where he said that he could get good images with a 1/5 second shutter: https://www.youtube.com/watch?v=uODR3nXPJ18&t=4 It was from this video that I first learned that such photography can be done with a drone. (His is the only mention or example of long exposure drone photography that I have been able to find.) He flies DJI drones, while I fly Autel Robotics, but the same principles apply.
Stewart and Alina have many other outstanding instructional videos at: https://dronefilmguide.com/
Please note that what I am recommending here is done best where the camera can be set for shutter priority and the aperture left variable to compensate for proper exposure. If you have a fixed (non-adjustable) aperture, the ISO will vary to suite the need, but the quality will be reduced when the ISO is high.
I dialed in the settings on my drone camera that Stewart recommended (which I previously did not know were possible) then tried it on location – and was stunned with the results!! I even had some where gusty winds were kicking the drone around, so of course I thought the shots would be ruined, but they came out great. In one situation I was flying at the bottom of a deep gorge where the GPS signal was limited, causing the drone to drift sideways (I recalibrated the remote, but the problem persisted). The photos were still quite sharp, which says a lot for the gimbal stabilization that was built in to this drone.
I said earlier that I bracket around .4 seconds exposure time, while Stewart recommended 1/5 second. I have been pleased with the results I get with 1/5 second, and a slower shutter increases the risk of blurred rocks, but I had to see what I could get away with. So, I took some photos with 1/4 second shutter (the next slower speed), and they came out just fine. But the remote beeped each time, as if the warn me of a potential problem. Conditions were calm when I tried it: any wind would probably have caused a blur. I have not found any mention of slow shutter speeds in the Autel Robotics manuals or web site, but it appears that the camera is designed to stabilize down to 1/5 second shutter in calm, no-wind conditions.
One other significant issue must be kept in mind when shooting moving water. We’ve all seen it: waterfall photos where the highlights are blown out and there is no texture or detail in all or parts of the water. The problem is that cameras will typically overexpose the water, and not record any data in the highlights. This will leave you with blank, white voids that cannot be recovered in post processing – there is nothing for the computer to work with. These are called “specular whites.”
Light meters are designed to average the light values within a scene, seeking a “balanced” exposure: one that will result in the best possible treatment of the entire scene. The problem is, when the subject is moving water, an exposure based on the middle light values will often cut off the ends, and not retain detail in the highest highlights or the darkest shadows. In my opinion, any losses in the highlights that result in specular whites is unacceptable
The solution is to reduce the EV (exposure value) in your camera settings. You can use the histogram (if available), or the overexposure warning. I have both on my still cameras and drones: I find using the histogram to be the most accurate, but the overexposure warning the quickest to use while flying. I dial down the EV until the overexposure warning goes away, then one more step below. For example, the warning often goes away when -.3 EV is selected, but I find that there are still some small voids if I don’t set it for -.7 EV. On my EVO ll, as much as -1.3 EV is sometimes required. Regardless of what your exposure meter may say, whether an in-camera or handheld meter, the only “correct” exposure is the one that produces the results you are looking for. I don’t have the time or space to explain how to use the histogram in this article, but you can read a good article at https://photographylife.com/understanding-histograms-in-photography.
This EV reduction often makes the rocks appear too dark, but they can be brought up in post. Some digital noise will often result, but is hardly noticeable as most rocks are rough anyway, and your highest priority is the look of the flowing water. It is, after all, the reason you take the photo in the first place.
If your camera is capable of recording in RAW/DNG format, using it will enable far more adjustability than is possible with a Jpeg image file. Converting RAW images requires more time and effort, but yields better results, especially when working with extremes in light values.
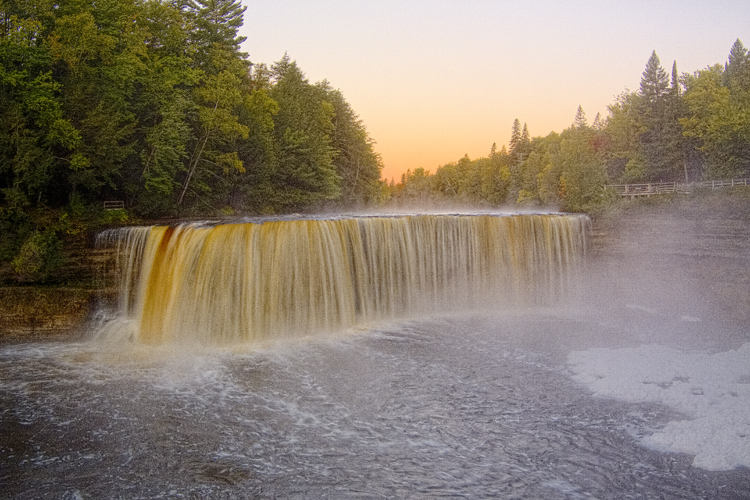
While we are on the subject of specular whites, light conditions play an overwhelming part in the quality of the final product – after all, “photo-graphy” literally means the “recording of light.” I have yet to get a good photo of a waterfall in full, bright sunlight: the contrast is too harsh and the colors washed out. Partial sun sometimes looks good to the eye, but can be very difficult to get a good image of: the sunlit spots – called “hot-spots” – are recorded as bright blotches that detract from the quality of the image. So, I prefer overcast conditions, anywhere from bright, overcast days to moderate rain. The overcast disperses and softens the light and deepens saturation. If the sky is stormy or with dramatic clouds, you may want to include it in your composition. If not, simply keep the sky out of the picture. Of course, you will not be able to fly in the rain.
Despite many years of frustrating results shooting waterfalls in partial sun with land-based cameras, I gave the drone a try, and was pleasantly surprised with the results: the sensor was able to handle the contrast well and deliver acceptable, even beautiful images. Here is one that I think is nice, though not good enough to sell:
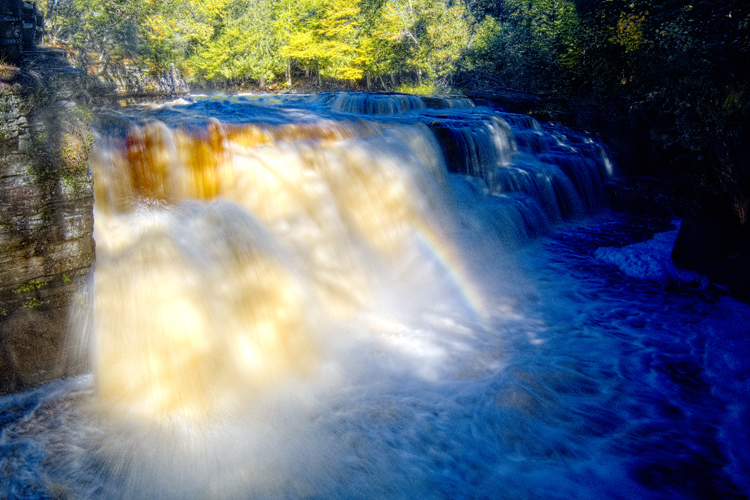
Canyon Falls Pk, Sturgeon R Gorge, MI
You can see how dark the shadows are, while the highlights have lost some detail.
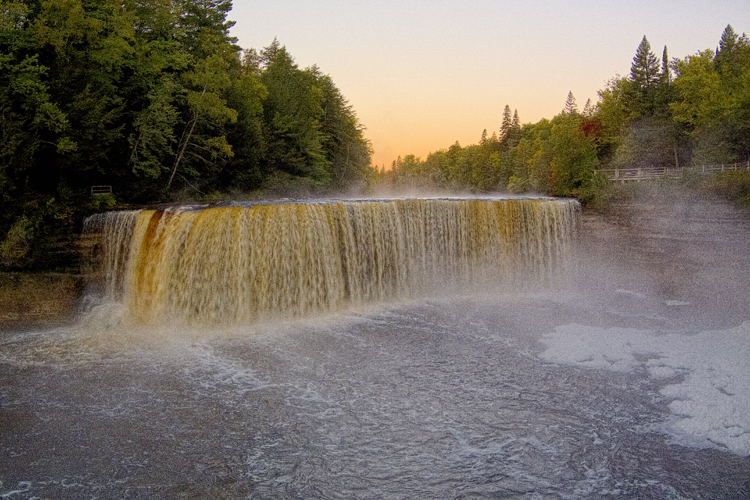
Here is another, taken on the same river a few minutes later, that I think is good enough to offer on this website:
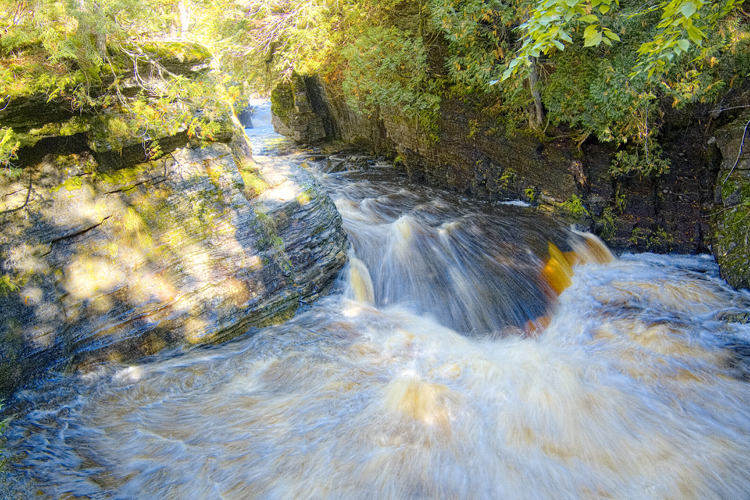
Canyon Falls Pk, Sturgeon R Gorge, MI
It is not likely that you will be able to slow down the shutter to 1/5 second without the use of an ND (neutral density) filter on the camera front. An ND filter reduces the light without changing the color, enabling the right exposure with a much slower shutter. For water photography, a polarizer filter is also highly recommended: it can be adjusted to full value to reduce unwanted glare on the water, or to the minimum if you want to capture the reflections of the sky or colorful leaves. Stewart Carroll teaches the use of ND filters for all drone videography: they are not a specialty item that is useful only for waterfalls. ND filters come in different strengths, and are available with or without a combined polarizer. I use a ND 16 with polarizer for normal to low-light conditions, and an ND 32 with polar for extremely bright light. I have not yet needed the ND 64 that came with my set.
I know nothing about what is available for other drones, but the best I have found for my EVO ll Pro is the Freewell, 8 filter set from B&H Photo: (https://www.bhphotovideo.com/c/product/1585741-REG/freewell_fw_ev6k_ald_all_day_4k_series.html) (also available from other sources). B&H pays me nothing for recommending them, but I have been buying camera gear from them for over 20 years and am completely happy with their prices and service.
Like any artistic endeavor, it will require some time and effort to hone your skills and learn how to get the results you are looking for. But the process can be fun and the photos beautiful. I can’t think of anything I would rather do than to scramble around on the banks of a creek, looking for those perfect shots that will soon add beauty and color to my home and the homes of others. And adding flight to the game increases the fun and possibilities exponentially.
No comments yet.